
Appearance
Create an invoice
Raise a bill for work you've done.
If the work was booked in as a job, don't start here — raise the invoice from the completed visits instead and most of this fills itself in. See Invoice a job.
For anything else:
- From the Invoices page, select New invoice.
- Work through the sections below.
- Select Approve & email to raise the invoice, or Cancel to leave without saving.
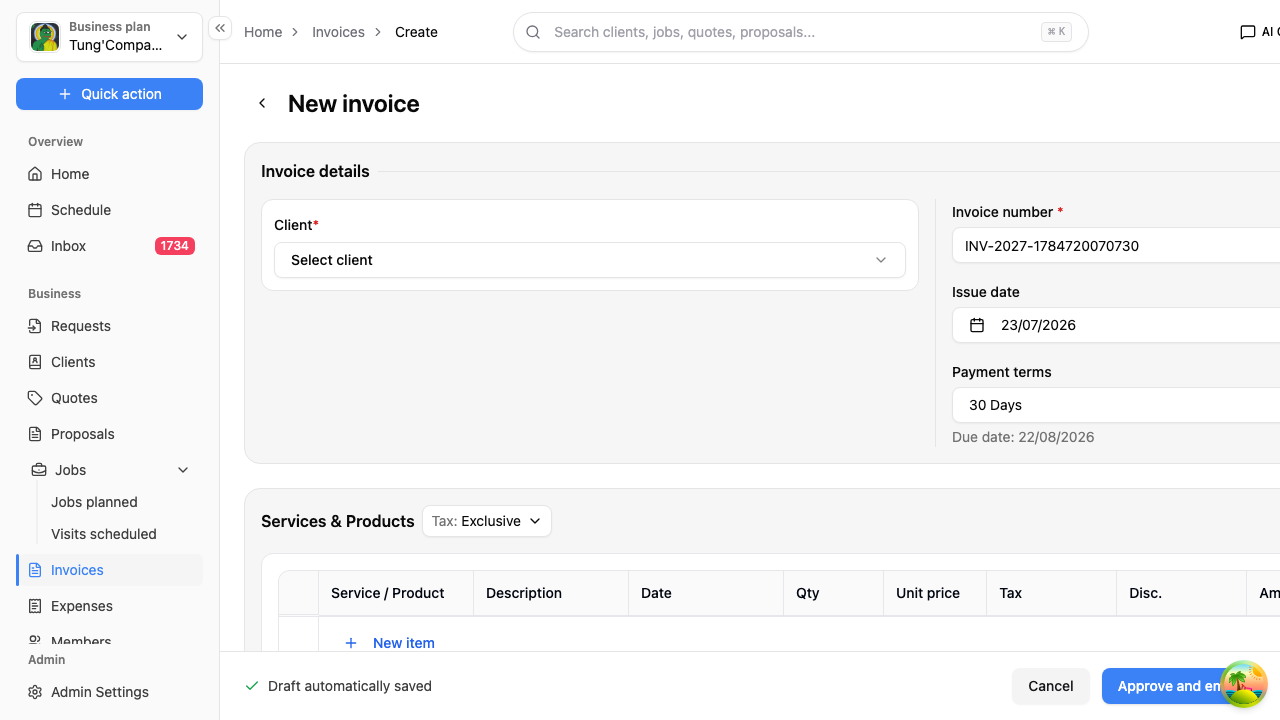
Who you're billing
Client — select the box and pick who the invoice is for. Start typing in the search box to narrow the list down.
Billing address — fills in from the client's saved address as soon as you pick them.
If the client has no address saved, this stays empty and there's no way to add one from this screen. Add it on their profile first — see View a client's profile.
Service address is different from billing address — tick this if you did the work at one address but the bill goes somewhere else, like a landlord or a managing agent.
Invoice number and dates
- Invoice number — already filled in for you, and you can change it if you number things your own way.
- Issue date — defaults to today.
- Payment terms — how long the client has to pay, 30 days by default. HiTradies works out the Due date and shows it underneath.
Services / Products
One line per thing you're charging for.
- Select Select service and choose from your saved services and products. The price fills in automatically.
- Set the Service date — the day the work was actually done. Useful when you're billing a few visits on one invoice.
- Adjust the Qty and Unit price, and set Tax and any Disc. (discount).
- Select Add item to add another line.
The Subtotal, Tax and Total update as you go.
Payments
If the client's already paid something — a deposit, or cash on the day — you can record it here with + Add before you raise the invoice.
You can also record payments later, which is usually easier. See Record a payment.
Notes
- Client message — what your client reads on the invoice. Already filled in from your saved template.
- Internal note — only your team sees this.
Once it's raised
You're taken to the send screen, where you can email it out straight away — see Send an invoice.