
Appearance
Managing your client list
A client is anyone you do work for — a homeowner, tenant, or a business. Keeping your client list accurate makes everything else in HiTradies work properly, since every quote, job, and invoice you raise is linked back to a client record.
Why clients matter
Every quote, job, and invoice in HiTradies is linked to a client, so setting one up is usually the first thing you do before any of that other work. Here's the typical flow for working with a client, start to finish:
- Add a new client the first time you quote or book work for them.
- Open their profile any time you need their details or want to check their job, quote, or invoice history.
- Edit their details if something changes, like a new phone number or address.
- Inactivate them if you no longer do work for them — HiTradies doesn't support deleting a client outright.
View and search your clients
View your client list
Select Clients from the sidebar to see everyone you've added, listed in a table.
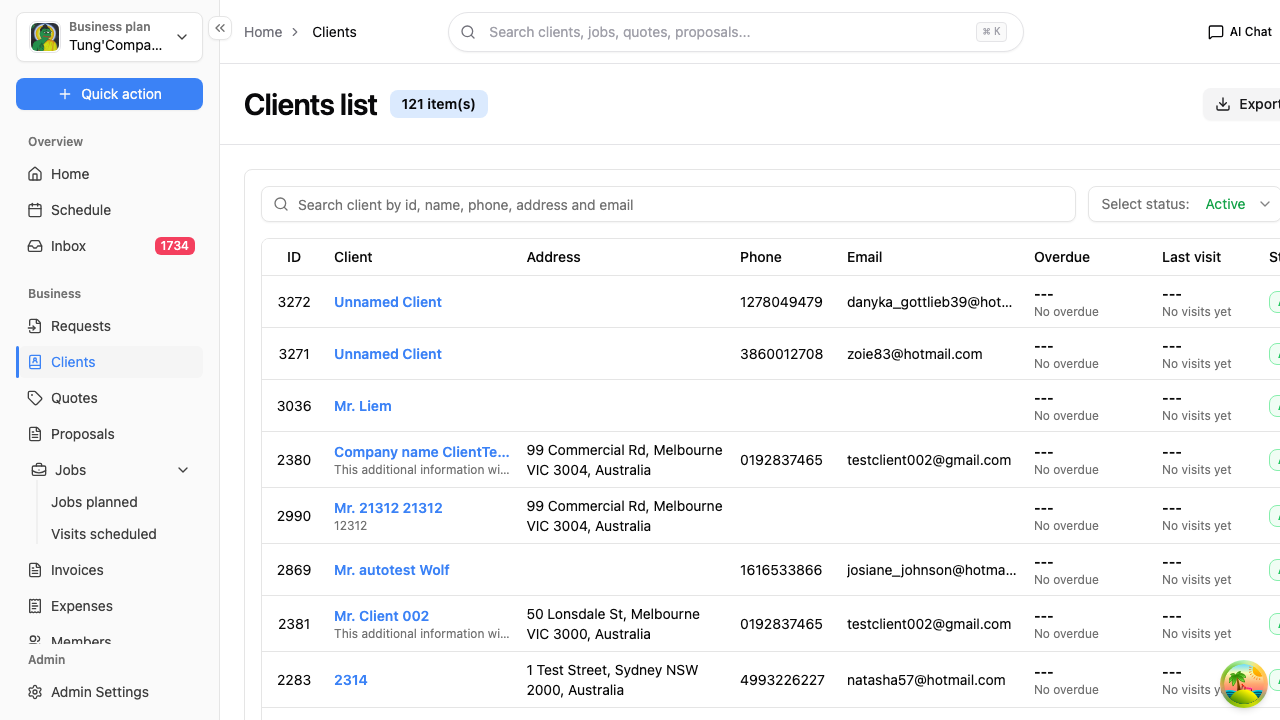
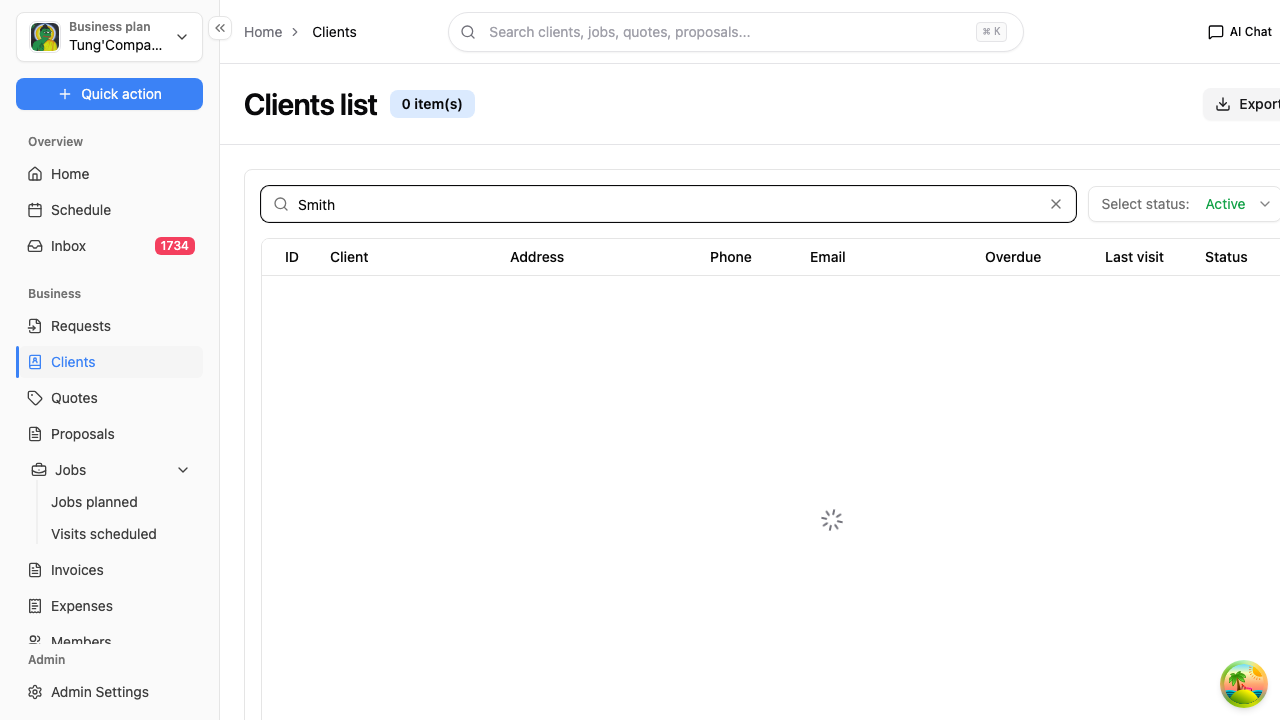
Search for a client
Use the search box above the list to quickly find a client by:
- Client ID
- Name
- Phone number
- Address
- Email address
Just start typing and the list updates to match.
Filter by status
By default the list only shows Active clients. Use the Select status dropdown above the list to switch and see clients you've inactivated too.
Add a new client
Add a client before you quote, book, or invoice work for them. The record you create here gets reused every time you raise a quote, job, or invoice for them later, so it's worth taking a moment to fill it in properly.
- From the Clients page, select New client.
- A panel slides in from the right — work through each section below.
- Select Approve to save the client, or Cancel to close the panel without saving.
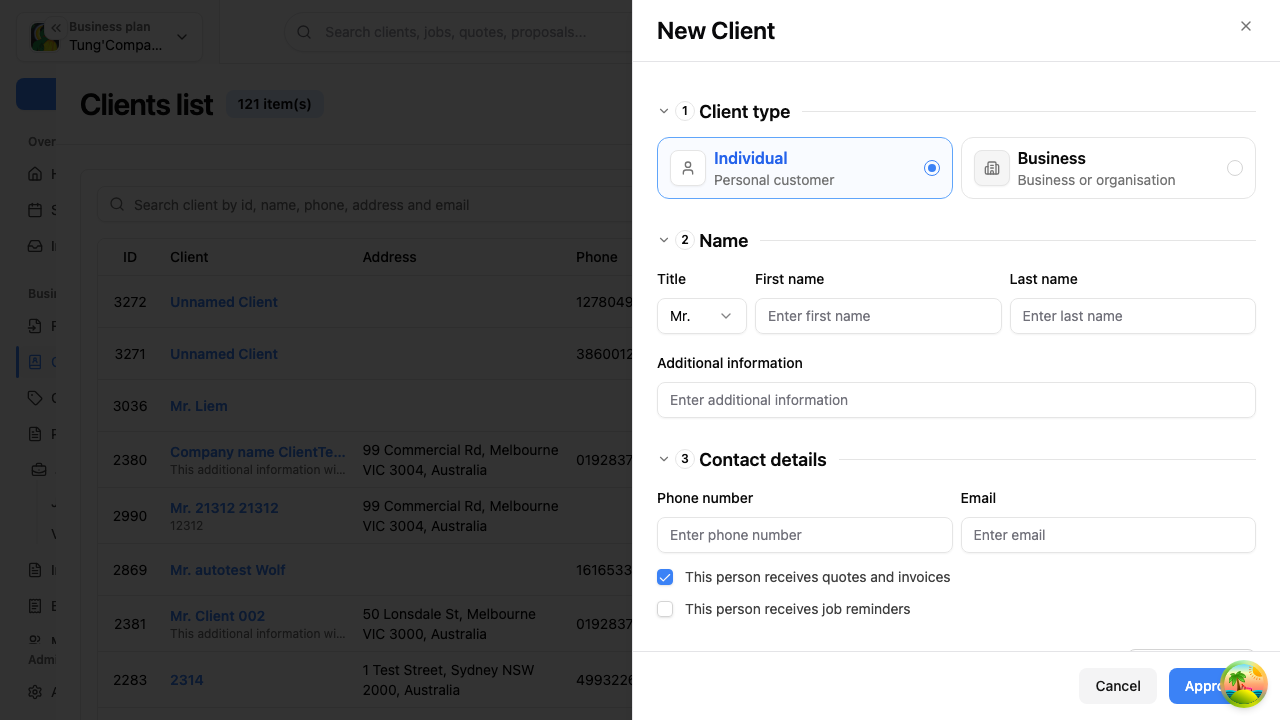
Client type
Choose Individual for a personal customer, or Business for a business or organisation. This changes which name fields show up in the next section.
Name
- Individual — title (e.g. Mr, Mrs), first name, last name, plus any additional information
- Business — company name, contact person, job title, plus any additional information
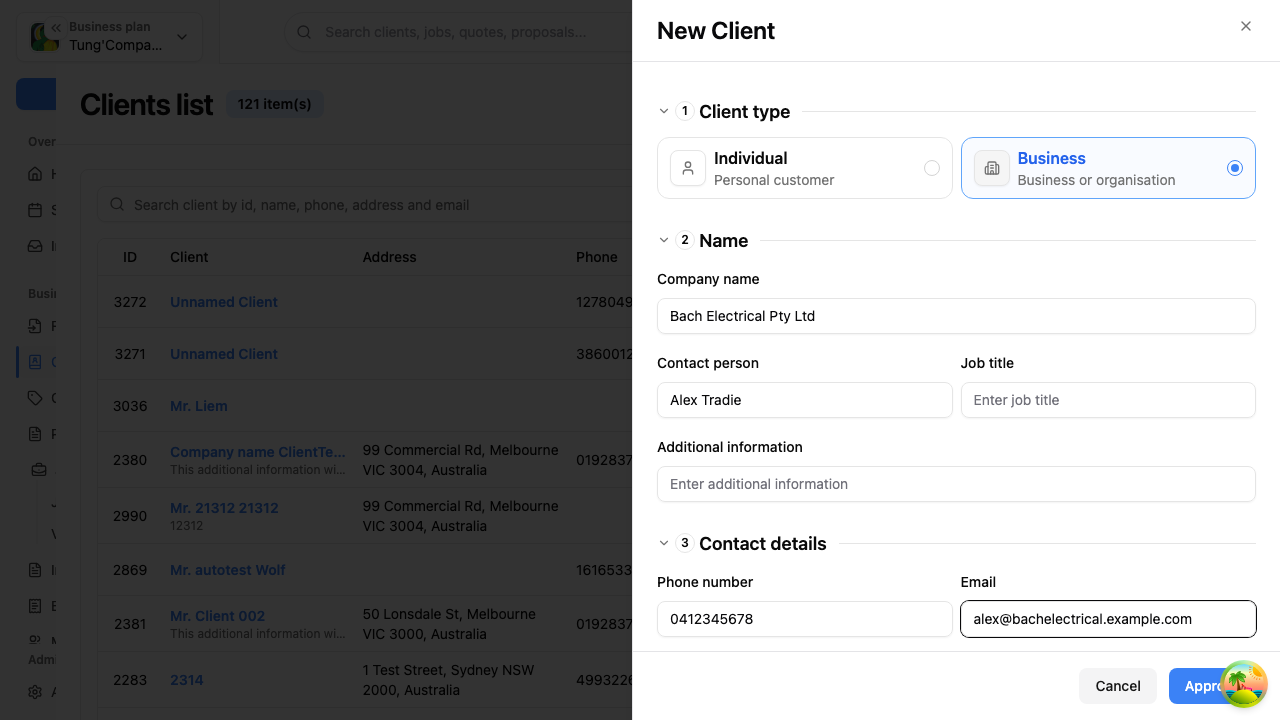
Contact details
Enter their phone number and email. Two tick boxes control whether this person:
- receives quotes and invoices
- receives job reminders
Service address
Start typing the address and pick it from the list of suggestions that appears — this is the address used when you schedule a job for them. Tick Primary address if it's their main one. Select New address if they have more than one (e.g. a holiday home or a second site).
Additional contacts
Select New person to add anyone else linked to this client — for example a partner, tenant, or office manager who should also get updates about the job.
Automated reminders
There's a switch here for Automated reminders, on by default. Every new client gets an email 1 hour and 1 day before each job starts — right now this can't be switched off, even if you flip it before saving. See Set up job reminders for a client to customise the channel and timing once they're saved.
Lead source
Where this client came from — Google, Facebook, Referral, Walk-in, or Tiktok. Worth setting so you can see later which channels are bringing in the most work.
Internal notes
Notes only your team can see — never shared with the client.
Once they're saved, select their name from the list to view their profile.
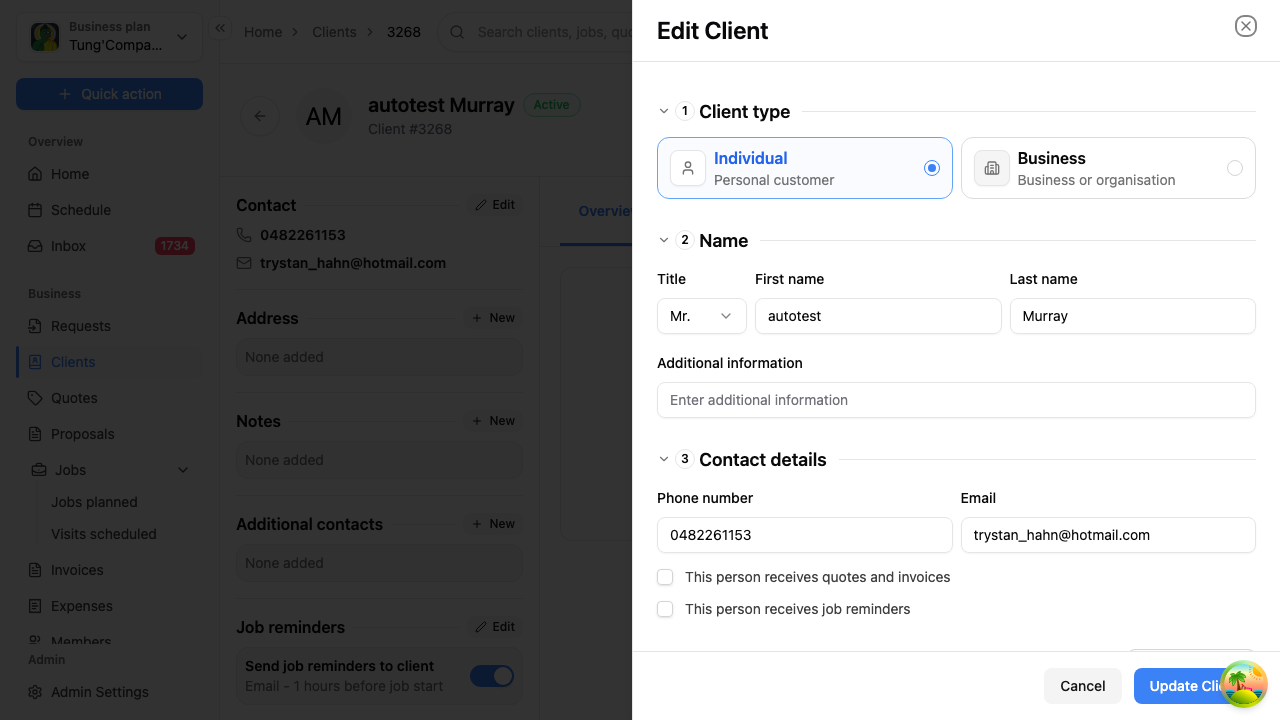
Edit a client
- Open the client's profile (select their name from the Clients list).
- Select the ⋯ menu, top right, then Edit.
- Update any of their details in the panel that opens.
- Select Update Client to save.
Quick edits from the profile
You don't always need to open the full Edit panel — each section on the Overview tab has its own shortcut:
- Contact → Edit to update their phone or email
- Address → Edit to add or update their service address
- Notes → New to add an internal note
- Additional contacts → New to add another contact
Inactivate a client
HiTradies doesn't let you permanently delete a client — instead, you mark them as inactive.
- Open the client's profile (select their name from the Clients list).
- Select the ⋯ menu, top right, then Inactivate.
- Select Confirm inactivate.
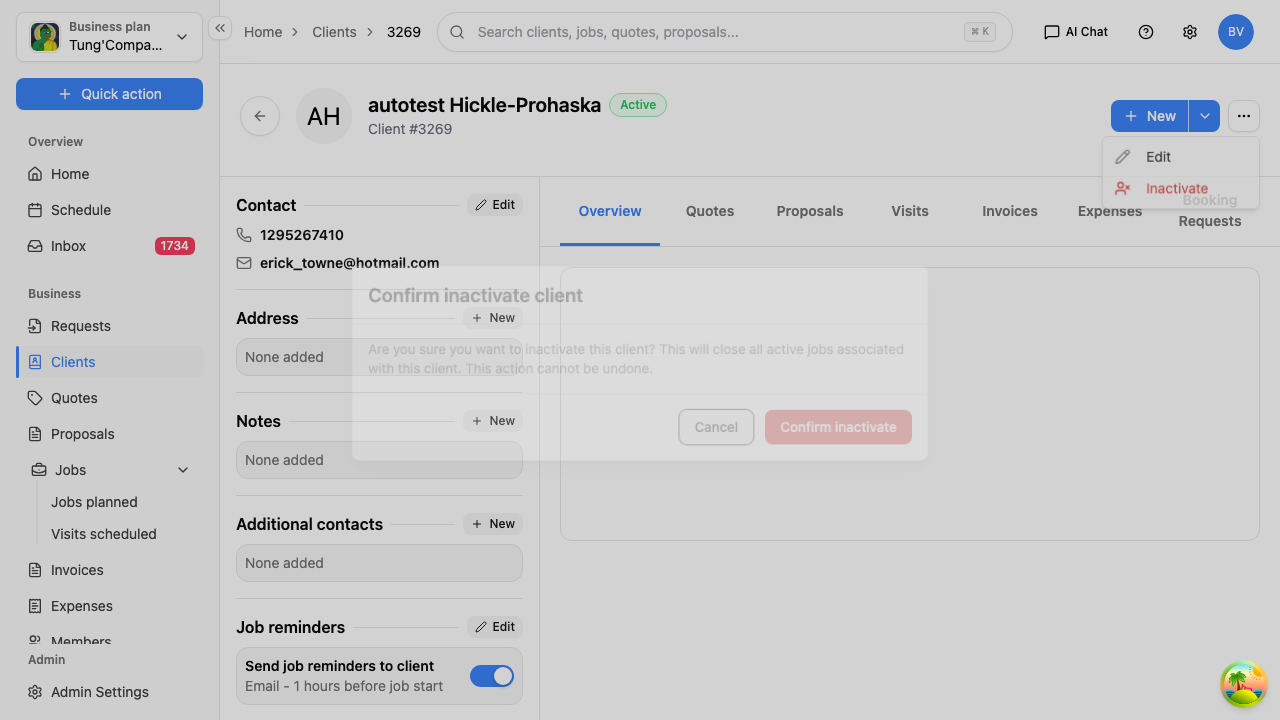
Inactivating a client also closes any of their active jobs, and this can't be undone — so double-check before confirming.
Want to see your inactive clients again? Use the Select status dropdown above the client list to switch from Active and find them — see View and search your clients.