
Appearance
Manage your visits
Every time someone is due on site is a visit. This is where you add, track, complete and cancel them.
Add an extra visit
Sometimes a job needs another trip that isn't part of the plan — a part didn't turn up, the client wants something finished off, or a recurring job needs one extra visit this month.
- Open the job from Jobs planned.
- Go to the Visits tab.
- Select New visit.
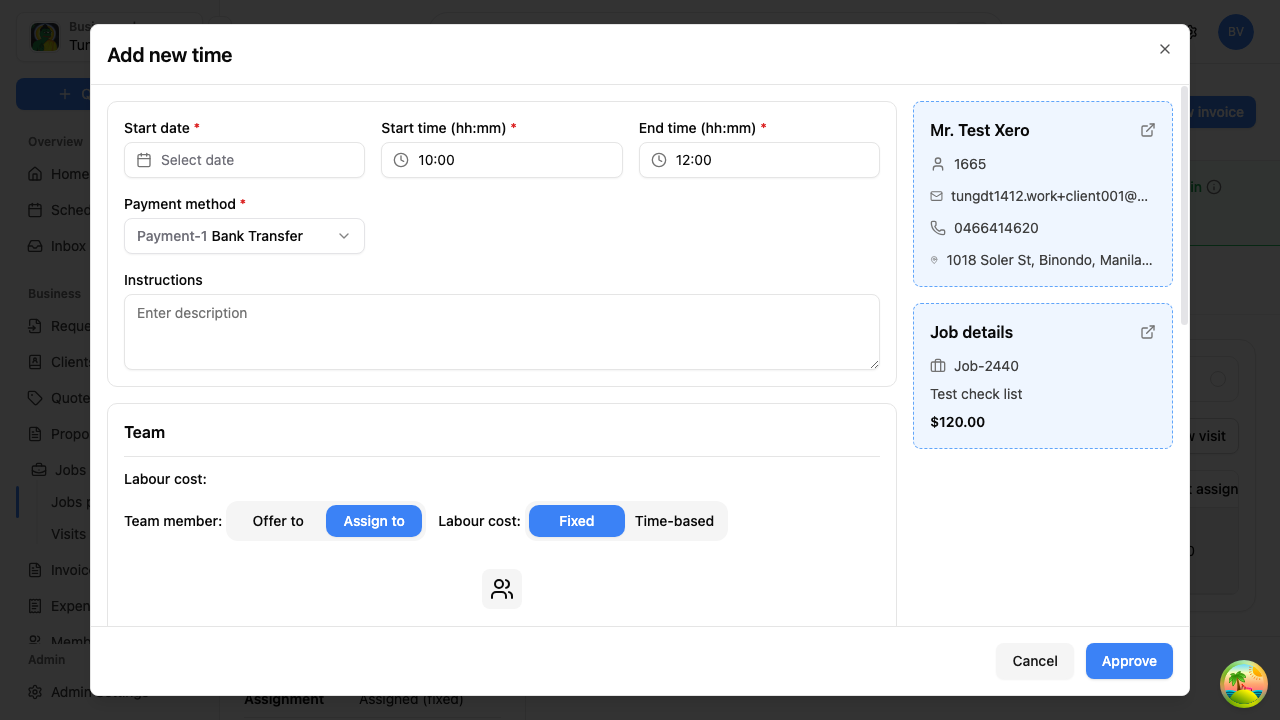
Fill in the Add new time window:
- Start date, Start time and End time
- Payment method
- Instructions — anything specific about this trip
- Team member — the same Offer to / Assign to and Labour cost choices as when you booked the job, then Select team members
Select Approve to add it, or Cancel to close without saving.
Handy to know
- The extra visit is added to this job only. On a recurring job it sits alongside the scheduled ones without changing the pattern.
- It's charged and invoiced like any other visit — see Invoice a job.
- You can assign a different person to this one visit if whoever normally does the job isn't available.
Manage your scheduled visits
Select Jobs in the sidebar, then Visits scheduled, to see every visit across all your jobs in one list. This is where the day-to-day happens — marking work done, cancelling a trip, invoicing what's finished.
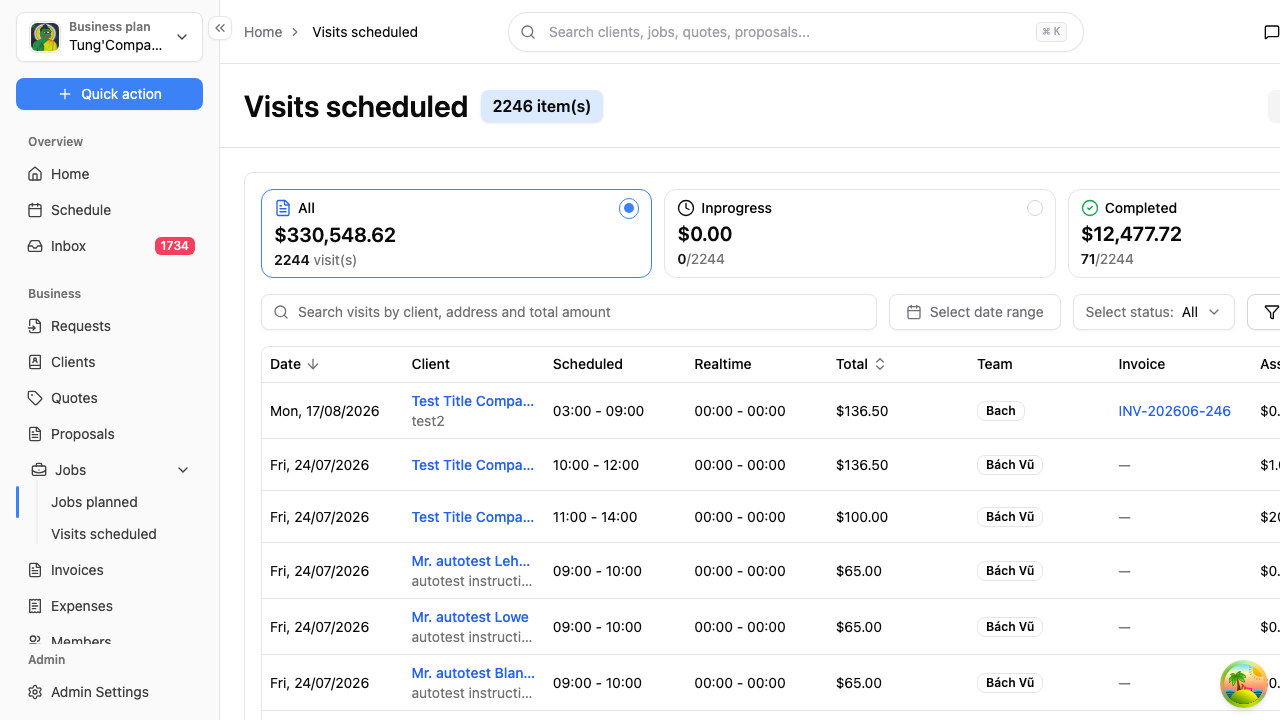
How your work is tracking
Three summary cards sit above the list, each with a dollar total and a count:
| Card | What it covers |
|---|---|
| All | Every visit |
| Inprogress | Booked in, not finished |
| Completed | Work that's done |
Find a visit
Use the search box to find one by client, address or total amount. Note it doesn't search by visit number — search the client instead.
You can also narrow the list with:
- Select date range — just this week, or a particular day
- Select status — see below
- Filter and Column — extra filters, and which columns you see
Visit statuses
| Status | What it means |
|---|---|
| Scheduled | Booked in and still to happen |
| Overdue | The date has passed and it hasn't been marked complete |
| Completed | The work is done |
| Canceled | The visit isn't happening |
Overdue usually just means someone's forgotten to mark it done, so it's worth a look through these regularly.
What each row shows
Date, client, the scheduled and actual times, total, who's on it, whether it's been invoiced, the amount assigned to the team, and its status.
See the full details of a visit
Select anywhere on a visit's row to open it. A window shows you everything about that visit without leaving the list — the times, the money (margin, total, labour, profit), who's assigned, the instructions, the team chat, the checklist, the client's contact details, a link back to the parent job, whether client feedback has been sent, and the services on the visit.
Close it with Close, or use Edit to make a change.
Act on a visit
Select the ⋯ button at the end of a visit's row.
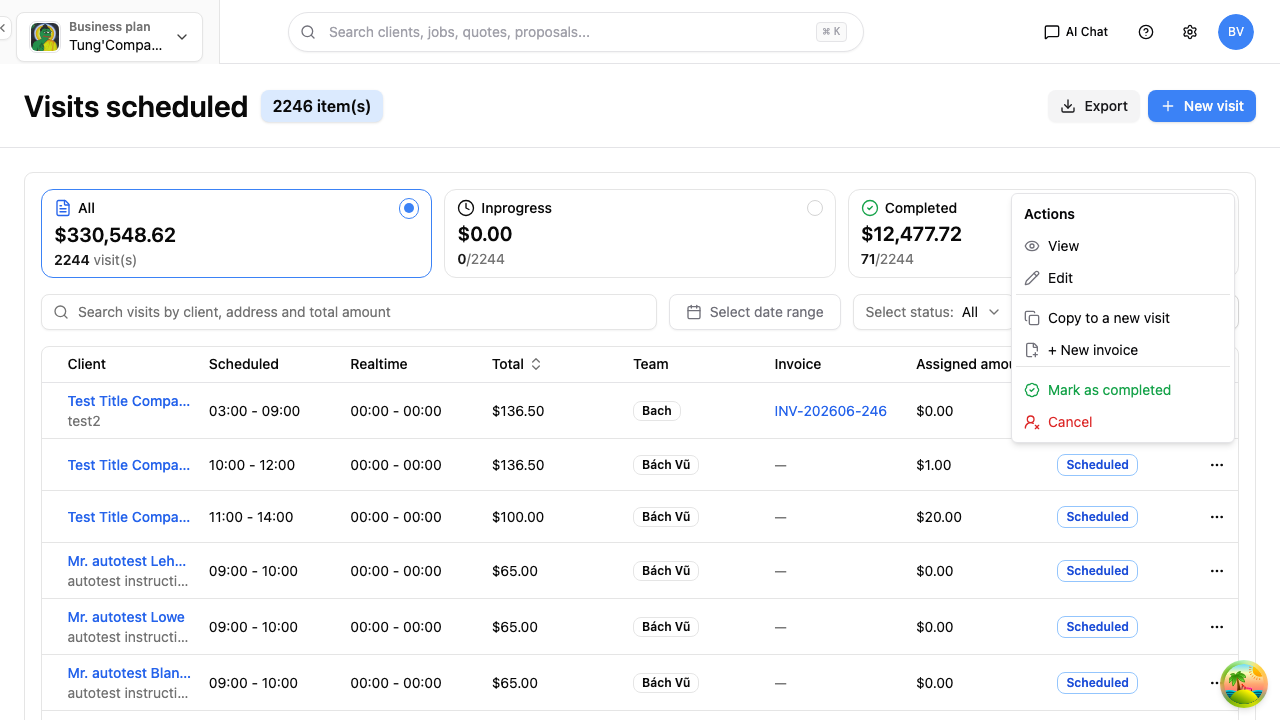
| Action | What it does |
|---|---|
| View | Opens the visit details |
| Edit | Change the date, time, team or instructions |
| Copy to a new visit | Set up another visit with the same details |
| Generate invoice | Bill for this visit, see Invoice a job |
| View invoice | Opens the invoice, if this visit's already been billed |
| Mark as completed | The work is done |
| Unmark as completed | Undo that, if you marked it too early |
| Resend feedback | Send the client another request for feedback |
| Cancel | The visit isn't happening |
Which of these you see depends on where the visit is up to. A completed visit, for example, offers Unmark as completed in place of Mark as completed and Cancel.
Marking a visit as completed
Select Mark as completed once the work's done. Two things happen:
- The visit becomes available to invoice — see Invoice a job.
- If the team member on the visit is being paid for it, that wage is recorded as an expense against the job automatically, so the job's profit figure stays accurate.
Marked one done too early? Unmark as completed puts it back.
Cancelling a visit
Cancel takes effect immediately — there's no confirmation window and no undo button. Make sure you've got the right row before you select it.
If you cancel one by mistake, contact your HiTradies administrator to have it restored.